Heavenly Light Cloud Cake: An Incredible 7-Step Recipe
Heavenly Light Cloud Cake is a delightful dessert that will amaze anyone lucky enough to taste it. With its ethereal texture and luscious flavors, this cake is a showstopper at any gathering. Imagine biting into a cloud where flavors of vanilla and a hint of lemon dance on your tongue. This cake is not just a dessert; it’s an experience that brings smiles and joy to every occasion.
Have you ever craved a dessert that feels light yet satisfying? Heavenly Light Cloud Cake meets that craving perfectly. Each slice offers a fluffy, melt-in-your-mouth quality that leaves you feeling blissfully satisfied, yet wanting more. Whether celebrating a special occasion or simply treating yourself, this cake is bound to impress. Its light texture combined with a subtle sweetness transforms simple ingredients into a treat everyone can enjoy.
In this article, you will discover why this recipe is a must-try. You’ll learn about its unique qualities, prepping techniques, and serving suggestions. No baking expertise is required, making it accessible to everyone. So, let’s dive into the world of Heavenly Light Cloud Cake and uncover the secrets of making this incredible dessert!
Why You’ll Love This Recipe
There are many reasons why Heavenly Light Cloud Cake becomes a beloved dessert recipe in your repertoire. Here are six standout features that make this cake irresistible:
- Fluffy Texture: The unique method of preparation creates an incredibly airy texture, akin to biting into a cloud.
- Simple Ingredients: Most ingredients are staples in your pantry, making it easy to whip up whenever a dessert craving strikes.
- Perfect for Any Occasion: Whether it's a birthday party, holiday celebration, or a casual weeknight treat, this cake suits every event perfectly.
- Versatile: The basic recipe is easily adaptable. You can infuse flavors like almond, chocolate, or even fruit to match your taste.
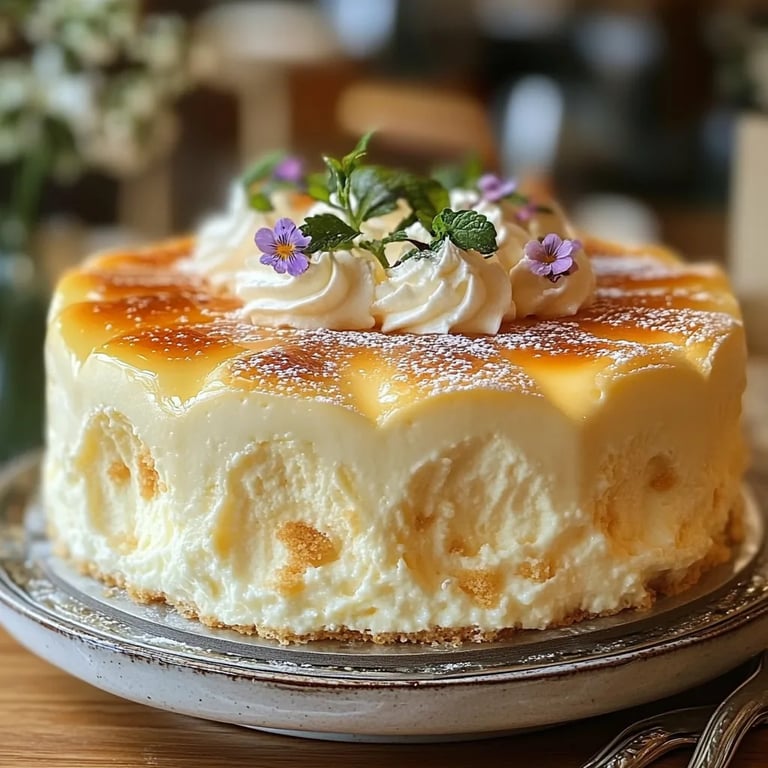
- Impressive Presentation: The light, frosted top and fluffy appearance make this cake a centerpiece worthy of admiration.
- Easy to Follow Instructions: With clear and straightforward steps, even novice bakers can achieve bakery-quality results without stress.
These features highlight why Heavenly Light Cloud Cake stands out among other desserts. Each bite promises to evoke joy and comfort, making it hard to resist having just one slice!
Preparation and Cooking Time
Creating this incredible cake is straightforward and doesn’t take too long. On average, you will need about 1 hour and 10 minutes for the entire process, which includes prep time, baking, and cooling. Here's a brief breakdown of the timing:
- Preparation Time: 20 minutes
- Cooking Time: 30-35 minutes
- Cooling Time: 15-20 minutes
This time frame ensures that you efficiently create a cake that’s both delicious and visually stunning!
Ingredients
- 1 cup all-purpose flour
- 1 ½ cups granulated sugar
- ½ cup unsalted butter, softened
- 4 large eggs
- ½ cup milk
- 1 teaspoon vanilla extract
- 1 teaspoon lemon zest
- ½ teaspoon baking powder
- ¼ teaspoon salt
- Powdered sugar, for dusting (optional)
Step-by-Step Instructions
Making Heavenly Light Cloud Cake is a straightforward process. Follow these simple steps for the best results:
- Preheat the Oven: Preheat your oven to 350°F (175°C). Prepare a 9-inch round cake pan by greasing and dusting it with flour.
- Cream the Butter and Sugar: In a large bowl, beat the softened butter and granulated sugar until light and fluffy.
- Add the Eggs: Add eggs one at a time to the butter mixture, mixing well after each addition.
- Combine Dry Ingredients: In a separate bowl, combine the flour, baking powder, and salt. Gradually add this mixture to the butter mixture while alternating with milk. Stir in the vanilla extract and lemon zest.
- Pour into the Cake Pan: Transfer the batter into the prepared cake pan, smoothing the top with a spatula.
- Bake: Place in the preheated oven and bake for 30-35 minutes, or until a toothpick inserted in the center comes out clean.
- Cool the Cake: Remove the cake from the oven and let it cool in the pan for 15 minutes. Then, turn it out onto a wire rack to cool completely.
These steps will lead you to create the delightful Heavenly Light Cloud Cake effortlessly.
How to Serve
Serving Heavenly Light Cloud Cake can be a delightful experience on its own. Here are some creative ideas to make your presentation memorable:
- Presentation: Place the cooled cake on a decorative cake stand. The height will elevate the presentation, making it visually appealing.
- Toppings: Consider topping with whipped cream and fresh fruits like strawberries or blueberries for added color and flavor.
- Dusting: Lightly dust the top with powdered sugar just before serving for an elegant touch.
- Slice Size: Cut into thin wedges to serve. This way, guests can enjoy a lighter portion, encouraging them to have seconds!
- Accompanying Beverages: Serve the cake with a side of hot coffee, tea, or even vanilla ice cream for a delightful combination.
By putting thought into how you serve this cake, you enhance the entire dessert experience, creating lasting memories for all who enjoy it!
Additional Tips
- Use Room Temperature Ingredients: For the best texture, ensure that your butter and eggs are at room temperature before mixing. This helps in creating a smooth batter.
- Don’t Overmix: When combining the dry and wet ingredients, mix gently until just combined. Overmixing can lead to a dense cake instead of a fluffy one.
- Experiment with Flavorings: Don’t hesitate to add a touch of almond extract or other flavorings to elevate your cake’s taste profile.
- Check for Doneness: Keep an eye on the cake as it bakes. Oven temperatures can vary, so check for doneness a few minutes before the suggested baking time.
Recipe Variation
Feel free to get creative with your Heavenly Light Cloud Cake! Here are some delightful variations to consider:
- Chocolate Cloud Cake: Replace half of the flour with cocoa powder for a rich chocolate version. Adjust sugar to taste.
- Citrus Twist: Add orange zest in addition to lemon for a zesty flavor that brightens the cake.
- Layered Cake: Bake two rounds of cake and layer them with whipped cream and fresh fruit in between for an impressive dessert.
- Gluten-Free Version: Substitute the all-purpose flour with a gluten-free blend to cater to those with dietary restrictions.
Freezing and Storage
Proper storage will help maintain the cake's delicate texture and flavor:
- Refrigeration: Keep the cake in an airtight container in the fridge for up to 5 days. This will preserve its moisture and freshness.
- Freezing: For longer storage, slice the cake and wrap individual pieces in plastic wrap. Place them in a freezer-safe bag or container. The cake can be frozen for up to 3 months. Ensure they're tightly sealed to prevent freezer burn.
Special Equipment
Using the right tools can make all the difference:
- Mixing Bowls: A set of various sizes will make it easier to mix and combine ingredients.
- Electric Mixer: This tool is crucial for achieving the fluffy texture of the cake. It saves time and effort.
- Spatula: Use this to smooth the batter into the pan and to fold in ingredients gently.
- 9-inch Round Cake Pan: This standard size ensures even baking and proper height for the cake.
Frequently Asked Questions
How do I know when the cake is done baking?
Insert a toothpick or tester into the center. If it comes out clean or with a few crumbs, it's done. If it comes out wet, continue baking for a few more minutes.
Can I make this cake ahead of time?
Absolutely! This cake can be made a day ahead. Store it in the refrigerator to allow the flavors to meld together.
Is this cake suitable for dietary restrictions?
Yes! You can easily substitute gluten-free flour for all-purpose flour. It makes a delicious gluten-free version without sacrificing texture.
Can I reduce the sugar in the recipe?
You can lower the sugar amount, but keep in mind that it may affect the cake’s moisture and sweetness. Start with a 25% reduction and adjust next time as you see fit.
Conclusion
Heavenly Light Cloud Cake is not just a dessert; it’s a moment of joy and delight. Its light, airy texture and delightful flavors make it a perfect addition to any celebration or simply as a treat for yourself. Those who take the time to bake this cake will be rewarded with a stunning centerpiece that pleases the palate and warms the heart. Whether you follow the original recipe or try one of the delightful variations, every bite of Heavenly Light Cloud Cake is bound to leave you feeling blissfully satisfied.