Galentine's Sweetheart Chocolate Cake
Highlighted under: Sweet Baking Recipes
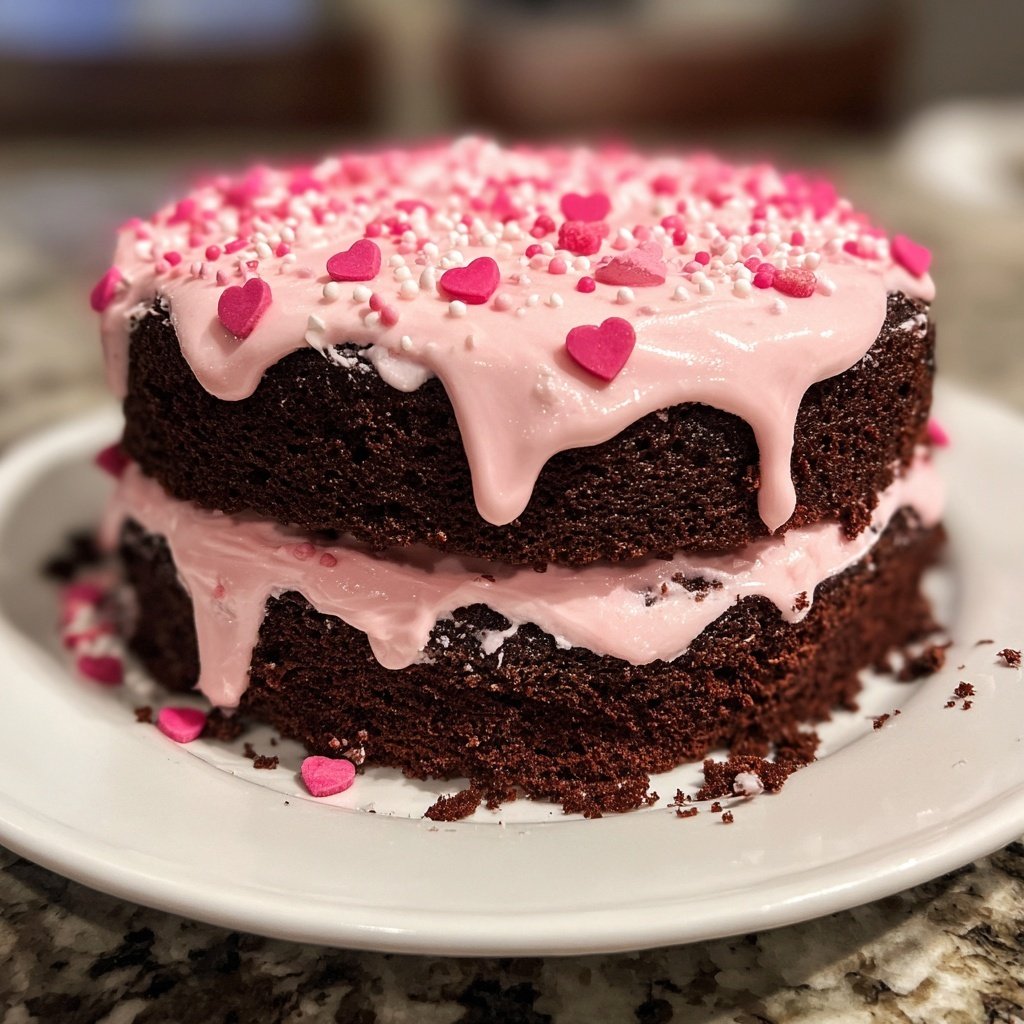
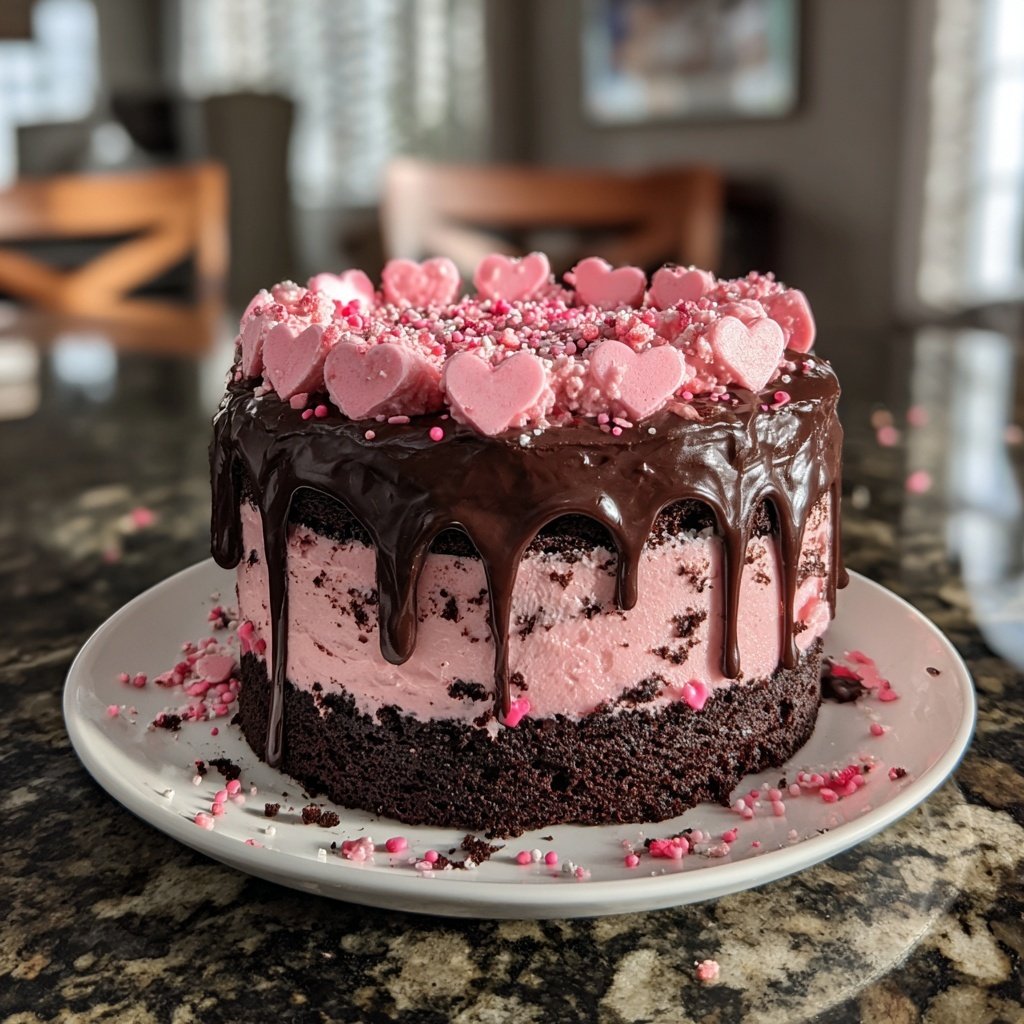
I absolutely love baking this Galentine's Sweetheart Chocolate Cake for my friends during our annual celebration. The combination of rich chocolate and delicate heart-shaped layers creates a perfect canvas for indulging in love and friendship. Every bite is a decadent treat, and the festive decoration adds a sense of occasion. It’s not just about the cake but also about creating sweet memories while we enjoy this delightful dessert together. Trust me, your friends will adore this homemade creation as much as I do!
Baking this cake is always a joy for me. The rich chocolate flavor combined with a hint of orange zest makes it an unforgettable experience. I remember the first time I baked this for my friends, and the smiles on their faces made all the effort worthwhile. This cake resembles love in its layers, the way it brings people together.
I found that using good quality cocoa powder truly elevates the flavor profile. Also, chilling the cake slightly before decorating with fresh cream gives it a luxurious texture. It’s these little tips that make for a fantastic celebration cake!
Why You'll Love This Recipe
- Rich chocolate flavor paired with fresh orange zest
- Creamy texture that melts in your mouth
- Perfect for celebrations or as a sweet indulgence
The Significance of Layering
Layering is crucial in achieving a delightful texture in the Galentine's Sweetheart Chocolate Cake. The lightness of each layer contributes to the overall indulgence. Use a serrated knife to carefully level the tops of the baked cakes before frosting. This will create a more even surface for stacking and help stabilize the cake, preventing any sliding during assembly. Make sure to apply a thin layer of frosting, known as a crumb coat, before the final layer to seal in the crumbs and create a smooth finish.
For unique flair, consider making the top layer smaller. Instead of two equal layers, bake one cake in a 9-inch round and the other in an 8-inch round pan. This way, you can stack the smaller cake on top, creating a stunning visual effect that's perfect for celebrations. It’s a simple twist that can elevate your cake's appearance, making it look even more special.
Understanding the Frosting
The frosting in this recipe plays a vital role, balancing the rich chocolate cake's flavors with its creamy sweetness. When beating the butter for the frosting, ensure it's softened but not melted, achieving a fluffy, airy consistency. The addition of heavy cream allows the frosting to be spreadable while maintaining a rich texture. If your frosting gets too thick, you can add more heavy cream, one tablespoon at a time, until you reach your desired consistency.
Another tip is to use high-quality cocoa powder for the frosting to enhance the chocolate flavor. Dutch-processed cocoa can provide a deeper color and a smoother taste, making your frosting even more luxurious. In case you’re out of cocoa powder, a mixture of melted chocolate can be a good substitute, although you’ll want to reduce the heavy cream slightly to maintain the right texture.
Storage and Serving Suggestions
If you have any leftover cake, store it in an airtight container at room temperature for up to three days. If you want to keep it longer, it can be refrigerated for up to a week, but allow it to come to room temperature before serving for the best flavor and texture. For longer storage, consider freezing slices individually. Wrap each slice tightly in plastic wrap before placing it in a freezer-safe bag; it can last up to three months.
When it comes to serving, I recommend garnishing each slice with fresh berries or a drizzle of chocolate sauce for added presentation and flavor complexity. A dollop of whipped cream or a scoop of vanilla ice cream can further elevate this dessert. These additions not only complement the rich chocolate cake but also enhance the overall celebration theme—perfect for your Galentine's gathering!
Ingredients
For the Cake
- 1 ¾ cups all-purpose flour
- 1 ¾ cups granulated sugar
- ¾ cup unsweetened cocoa powder
- 1 ½ tsp baking powder
- 1 ½ tsp baking soda
- 1 tsp salt
- 2 large eggs
- 1 cup whole milk
- ½ cup vegetable oil
- 2 tsp pure vanilla extract
- 1 cup boiling water
For the Frosting
- 1 cup unsalted butter, softened
- 3 ½ cups powdered sugar
- ½ cup unsweetened cocoa powder
- ¼ cup heavy cream
- 1 tsp vanilla extract
For Decoration
- Heart-shaped sprinkles
- Fresh berries (optional)
Gather all ingredients before starting for a smooth baking experience!
Baking Steps
Prepare the Oven
Preheat your oven to 350°F (175°C) and grease two 9-inch round cake pans.
Mix Dry Ingredients
In a large bowl, whisk together the flour, sugar, cocoa powder, baking powder, baking soda, and salt.
Add Wet Ingredients
Add the eggs, milk, oil, and vanilla extract. Mix at medium speed for 2 minutes, then carefully stir in the boiling water.
Bake the Cakes
Pour the batter evenly into the prepared pans and bake for 25 minutes or until a toothpick comes out clean.
Prepare the Frosting
Beat the butter until creamy, then gradually add the powdered sugar and cocoa powder. Mix in the heavy cream and vanilla extract until fluffy.
Assemble the Cake
Once cakes are cool, layer them with frosting between layers and cover the top and sides with frosting. Decorate as desired.
Let the cake sit for a bit before cutting to achieve clean slices!
Pro Tips
- For the best flavor, use high-quality cocoa powder and allow the cakes to cool completely before frosting. This prevents melting and ensures a beautiful finish.
Cake Variations to Consider
While the classic chocolate and orange zest combination is delightful, feel free to experiment with flavors! For a twist, substitute the orange zest with espresso powder to create a mocha chocolate cake. Simply add 1 tablespoon of finely ground espresso during the dry mixing phase, which will deepen the chocolate flavor beautifully.
You can also try adding a layer of raspberry or cherry jam between the cake layers for a fruity surprise that complements the chocolate. This addition provides a beautiful contrast, both in flavor and color, that can further enhance the presentation when garnished with fresh berries.
Troubleshooting Common Issues
If your cake domes too much while baking, it can lead to uneven layers. To combat this, ensure your oven temperature is accurate by using an oven thermometer. Additionally, place the cake pans on the center rack, and avoid opening the oven door too early during baking to maintain consistent heat.
Should you find your frosting too runny, it might be due to the butter being too warm or adding too much cream. If this happens, return the frosting to the refrigerator for about 15 minutes and then re-whip until it thickens. Conversely, if it's too thick, gradually mix in more heavy cream until you achieve the right consistency for spreading.
Questions About Recipes
→ Can I make this cake a day ahead?
Yes, this cake holds up well overnight. Just keep it covered to maintain freshness.
→ Can I substitute any ingredients?
You can use almond milk or a gluten-free flour blend, but results may vary.
→ How do I store leftovers?
Store leftovers in an airtight container in the refrigerator for up to 3 days.
→ Can I freeze the cake?
Yes, you can freeze the cake wrapped in plastic wrap and foil for up to 3 months.
Galentine's Sweetheart Chocolate Cake
Created by: The Freshbitesonly Team
Recipe Type: Sweet Baking Recipes
Skill Level: Intermediate
Final Quantity: 8 servings
What You'll Need
For the Cake
- 1 ¾ cups all-purpose flour
- 1 ¾ cups granulated sugar
- ¾ cup unsweetened cocoa powder
- 1 ½ tsp baking powder
- 1 ½ tsp baking soda
- 1 tsp salt
- 2 large eggs
- 1 cup whole milk
- ½ cup vegetable oil
- 2 tsp pure vanilla extract
- 1 cup boiling water
For the Frosting
- 1 cup unsalted butter, softened
- 3 ½ cups powdered sugar
- ½ cup unsweetened cocoa powder
- ¼ cup heavy cream
- 1 tsp vanilla extract
For Decoration
- Heart-shaped sprinkles
- Fresh berries (optional)
How-To Steps
Preheat your oven to 350°F (175°C) and grease two 9-inch round cake pans.
In a large bowl, whisk together the flour, sugar, cocoa powder, baking powder, baking soda, and salt.
Add the eggs, milk, oil, and vanilla extract. Mix at medium speed for 2 minutes, then carefully stir in the boiling water.
Pour the batter evenly into the prepared pans and bake for 25 minutes or until a toothpick comes out clean.
Beat the butter until creamy, then gradually add the powdered sugar and cocoa powder. Mix in the heavy cream and vanilla extract until fluffy.
Once cakes are cool, layer them with frosting between layers and cover the top and sides with frosting. Decorate as desired.
Extra Tips
- For the best flavor, use high-quality cocoa powder and allow the cakes to cool completely before frosting. This prevents melting and ensures a beautiful finish.
Nutritional Breakdown (Per Serving)
- Calories: 380 kcal
- Total Fat: 26g
- Saturated Fat: 15g
- Cholesterol: 195mg
- Sodium: 85mg
- Total Carbohydrates: 32g
- Dietary Fiber: 3g
- Sugars: 24g
- Protein: 6g