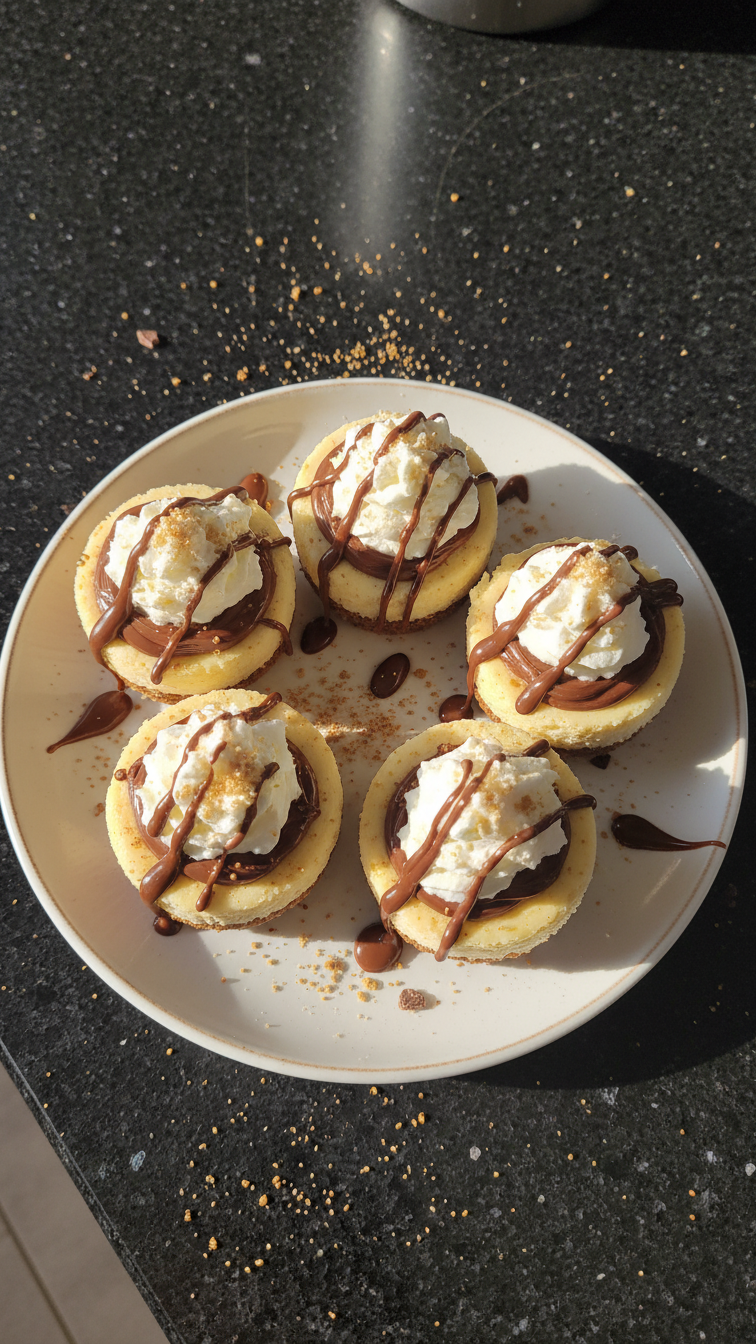
Sweetheart Nutella Cheesecake Cups
Highlighted under: Sweet Baking Recipes
I absolutely love making these Sweetheart Nutella Cheesecake Cups when I want to impress my friends or indulge in a sweet treat myself! With a rich and creamy Nutella filling and a crisp chocolate crust, these cups are a perfect combination of flavors. I enjoy how easy they are to prepare, yet they feel so luxurious! Whether it’s a special occasion or a little self-care moment, these mini cheesecakes are a delightful way to show love, both to myself and to those I cherish.
When I first created this recipe, I was looking for a fun yet simple dessert to make for a gathering. The combination of Nutella and cream cheese creates such a luscious filling; it melts in your mouth! One tip I learned is to whip the cream cheese until it's fluffy before adding the Nutella, which enhances the texture and flavor of the filling.
After a few trials, I realized that serving them in adorable cups not only elevates the presentation but also makes them perfect for portion control. These Sweetheart Nutella Cheesecake Cups are now my go-to recipe for any occasion, and I'm always met with rave reviews!
Why You Will Love This Recipe
- Decadent flavour of Nutella combined with smooth cheesecake
- No-bake recipe that's simple to prepare
- Perfectly portioned for individual enjoyment
Creating the Perfect Crust
The crust of these Sweetheart Nutella Cheesecake Cups is crucial to achieving that satisfying texture contrast with the creamy filling. Using chocolate cookie crumbs brings a rich, deep flavor that pairs beautifully with the Nutella. Make sure to use finely crushed crumbs for an even base, as larger pieces can make it difficult to achieve a uniform texture. If you don't have chocolate cookies, vanilla wafers can also serve as an alternative, though the flavor profile will shift slightly.
When mixing the melted butter with cookie crumbs, you want to achieve a consistency that holds together when pressed. It should resemble wet sand. If the mixture feels too dry and crumbly, consider adding a teaspoon more melted butter. Press it firmly into the base of each cup—this helps ensure that the crust stays intact when you scoop out the cheesecake filling. After pressing, I recommend refrigerating the crust for about 15 minutes to help it firm up before adding the filling.
Crafting the Cheesecake Filling
The cheesecake filling is what truly defines these cups, and incorporating the ingredients in the right order is key to achieving a smooth texture. Start by softening the cream cheese to room temperature to avoid lumps; this step guarantees a velvety filling. Make sure to beat the cream cheese until it’s completely smooth before adding Nutella and powdered sugar. This creates the ideal foundation for that luxurious texture we all love.
When folding in the whipped cream, use a gentle motion to maintain the light and airy consistency of the mixture. Overmixing at this stage can deflate the whipped cream, risking a denser filling. Aim to fold until no streaks remain visible, which usually takes about 30 seconds to a minute. If you find the mixture is too thick, a splash of milk can help achieve a smoother consistency without sacrificing richness.
Serving and Storing Tips
These cheesecake cups can be made ahead of time, making them a fantastic choice for parties or gatherings. Once assembled, they keep well in the fridge for up to four days, allowing the flavors to meld and deepen. I often make them the night before a special occasion; just remember to cover them tightly with plastic wrap to prevent drying out. Additionally, if you want to serve more than you planned, this recipe is easily doubled or halved; just adjust your ingredient quantities accordingly.
When it comes to garnishing, consider offering a variety of toppings to suit everyone's taste. While chocolate shavings and fresh berries add a lovely touch, crushed nuts or a drizzle of caramel sauce can enhance the flavor profile further. If you want to incorporate tropical flavors, try adding a sprinkle of toasted coconut for a unique twist. Presentation can elevate these cups, so consider using clear serving cups to showcase the layers!
Ingredients
Gather the following ingredients to make these delightful cheesecake cups:
For the crust:
- 1 cup chocolate cookie crumbs
- 4 tablespoons unsalted butter, melted
For the cheesecake filling:
- 8 oz cream cheese, softened
- 1/2 cup Nutella
- 1/2 cup powdered sugar
- 1 cup whipped cream
- 1 teaspoon vanilla extract
For garnish:
- Chocolate shavings
- Fresh berries (optional)
With these ingredients ready, you're all set to create your heavenly cheesecake cups!
Instructions
Follow these simple steps to prepare your Sweetheart Nutella Cheesecake Cups:
Prepare the crust
In a medium bowl, combine the chocolate cookie crumbs and melted butter. Stir until well mixed. Press the mixture evenly into the bottom of each serving cup.
Make the filling
In a separate bowl, blend the cream cheese until smooth. Add Nutella, powdered sugar, vanilla, and mix until creamy. Lastly, fold in the whipped cream gently until fully incorporated.
Assemble the cups
Spoon the cheesecake filling over the crust in each cup, smooth the tops, and refrigerate for at least 2 hours to set.
Garnish and serve
Once set, garnish with chocolate shavings or fresh berries if desired. Serve chilled and enjoy!
Your Sweetheart Nutella Cheesecake Cups are ready to wow your guests!
Pro Tips
- For extra flair, consider adding a drizzle of melted chocolate or a sprinkle of sea salt on top before serving.
Ingredient Variations
Consider customizing the flavor by swapping out Nutella for other spreads like chocolate hazelnut or almond butter. Each option will provide a distinct taste and texture, so choose based on your personal preference or dietary needs. For a dairy-free option, look for a vegan cream cheese substitute, ensuring it’s soft enough to blend smoothly with the whipped cream alternative. This allows those with dietary restrictions to enjoy a similar creamy dessert experience.
If you're looking to make this treat lighter, you can use Greek yogurt instead of cream cheese. This will produce a slightly tangier flavor but will still create a rich filling. Be mindful that the texture will differ, and you may need to adjust the sweetness with additional powdered sugar to balance the tanginess for your palate.
Troubleshooting Common Issues
If your filling turns out lumpy, it's likely due to the cream cheese not being softened adequately. Always let it sit at room temperature for at least 30 minutes before mixing. If you’re in a hurry, microwaving it in 10-second bursts can help but be careful to not overheat it, as cream cheese can get too soft if overheated. A high-speed mixer can also help smooth out any lumps after they form, just remember to keep the mixer on a low setting for gentle mixing.
Another common issue is the crust crumbling when you try to remove a serving. Ensure you firmly press the crust into the bottom of each cup and refrigerate it long enough before filling. If you encounter this problem, using mini tart pans with removable bottoms can make serving smoother and reduce the chances of breakage. This way, you can easily pop the desserts out when the time comes to serve!
Questions About Recipes
→ Can I make these cheesecake cups ahead of time?
Absolutely! You can prepare them a day in advance and keep them in the refrigerator until you're ready to serve.
→ Can I use a different type of chocolate cookie for the crust?
Yes, feel free to use any chocolate cookies you prefer, such as Oreos or chocolate graham crackers.
→ How long can the cheesecake cups be stored?
They can be stored in the refrigerator for up to 3 days, just make sure they are covered tightly.
→ Is it possible to make this recipe gluten-free?
Certainly! Use gluten-free chocolate cookies to make the crust gluten-free.
Sweetheart Nutella Cheesecake Cups
Created by: The Freshbitesonly Team
Recipe Type: Sweet Baking Recipes
Skill Level: Easy
Final Quantity: 4 servings
What You'll Need
For the crust:
- 1 cup chocolate cookie crumbs
- 4 tablespoons unsalted butter, melted
For the cheesecake filling:
- 8 oz cream cheese, softened
- 1/2 cup Nutella
- 1/2 cup powdered sugar
- 1 cup whipped cream
- 1 teaspoon vanilla extract
For garnish:
- Chocolate shavings
- Fresh berries (optional)
How-To Steps
In a medium bowl, combine the chocolate cookie crumbs and melted butter. Stir until well mixed. Press the mixture evenly into the bottom of each serving cup.
In a separate bowl, blend the cream cheese until smooth. Add Nutella, powdered sugar, vanilla, and mix until creamy. Lastly, fold in the whipped cream gently until fully incorporated.
Spoon the cheesecake filling over the crust in each cup, smooth the tops, and refrigerate for at least 2 hours to set.
Once set, garnish with chocolate shavings or fresh berries if desired. Serve chilled and enjoy!
Extra Tips
- For extra flair, consider adding a drizzle of melted chocolate or a sprinkle of sea salt on top before serving.
Nutritional Breakdown (Per Serving)
- Calories: 320 kcal
- Total Fat: 24g
- Saturated Fat: 14g
- Cholesterol: 70mg
- Sodium: 150mg
- Total Carbohydrates: 28g
- Dietary Fiber: 1g
- Sugars: 20g
- Protein: 4g